26 March 2011

Piano Seat Redo

Remember the piano seat well it's finally finished ..... ta-da! Yes, I am pleased with myself and as a result this post is a tad over photographed and slightly long winded!


The seat had 'fallen through' the inside and was the first thing to go. The braiding and the nail heads were old and disgusting!


I ended up getting almost all of the nails out but some of them were just too rusted so I nailed them back in and sanded over them, knowing they would be covered in the end.


When all the gross stuff was gone I sanded it a bit then cleaned it with baby wipes.
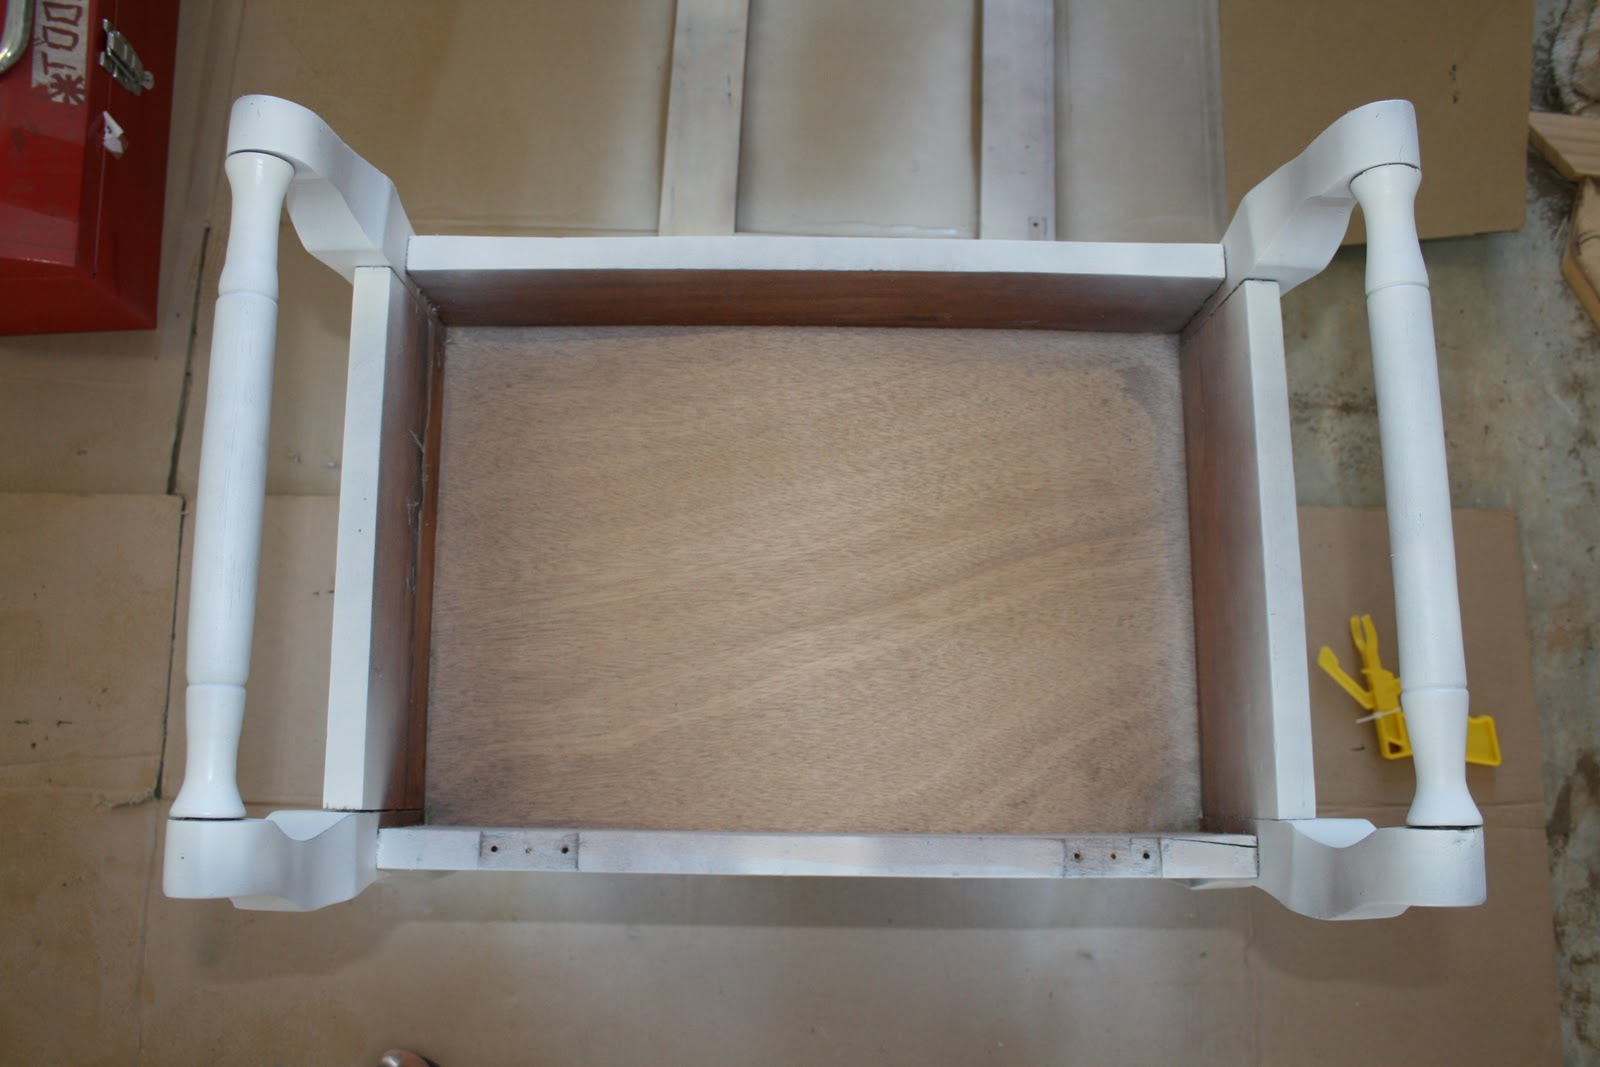

Then because it's treated wood I gave it two coats of spray primer in white, you only have to wait a couple of hours in-between coats. Then I used a flat white spray paint for the final coat and sanded it back on some of the corners and curves to give it that 'shabby' look. Then I had a baby {you might want to skip that step as it really drags out the process!} Finally I rubbed over some Poly to protect the paint and give it that satiny sheen. 

After the wood was complete I started on the seat, something I had put off since I didn't really know how I was going to make it work. There were lots of layers of grossness behind that faded fabric! In the end I decided to copy the old seat design exactly {it took me a while to come up with that genius plan} I pulled it apart and used it as a pattern.


I used an old T-shirt to cover some board and wadding then stapled it at the back. I already owned some cute fabric {from here} and used the old seat cover to determine size.


I was a bit skeptical about the strength of the old seat, after all it had fallen through but I stuck to the plan of copying what was originally there so I hot glued some pink fabric on the bottom then stapled for extra strength {the original green piece of fabric was just glued on.} Then I placed my newly recovered cushion on top with more hot glue. Then I placed my cute fabric over the top and glued the edges down so that it covered all the old nail holes.


To finish it off I skipped the circa sixties braiding and went straight to nail head trim. {Which I bought here} Mostly you buy nail heads individually which is expensive, time consuming and lets face it unless your a professional upholsterer your never going to get those nail heads to line up straight. If you buy them already joined up in a kit like this it's much easier {although a few nails still died at the hands of my hammer} which by the way you should cover so you don't scratch them all up. Baby sock does the perfect job! You can see the pink underneath when the seat is open.


Glad it's finished, now I can work on the little space were this is going. 


10 March 2011

He's Arrived

A project 9 months in the making and finally finished .... or should I say just begun? Either way he's here and he's perfect. 


02 March 2011

Recent Treasures

You know what they say, one girls trash is another girls treasure. Here are some recent finds, hopefully I'll get round to redoing them soon.

For a while I had been looking for something exactly like this for a specific little project I have in my mind. I found it at a retro {expensive} second hand shop but despite my mad bargaining skills {if you listen closely you can hear my husband scoffing} I couldn't get it down from the $50 price. Way too much, but just what i wanted. 

These were from a local op shop. Stuff like this comes in handy for, you guessed it, baby showers! As well as other tea party style dos. My mum had the exact same glass punch cups when i was little, I thought they were so classy! Now I think they are worth the .30c I payed for them.

I don't know what these little silver plates are for but I thought they would be so sweet as individual cupcake plates.

Or you could do this filled with chocolate mouse, whipped cream and a strawberry on top. Yum.

These were just lying unused around my house. Why yes, I do have a thing for frames. Put them all together and I think they will go great in my nursery do over. 

I like the simple lines of this little baby found at the tender centre. I bid $12 but it was below reserve, they took $16. Not wonderful but good condition and perfect for what I need. 


Stay tuned!


17 February 2011

Shower Time

I realise this is another post about babies but being pregnant is really going around at the moment {watch out}. Not only am I expecting, but 2 of my sister-in-laws as well and you know what that means .... shower time!

Putting on a baby shower is so .... lovely and a good excuse to ooh and ahh over sweet baby things. I've done a couple in my time and they've all been a bit different, depending on the personality of the mama to be. I was too busy hosting to take any good photos dang it but here is a look anyway.

My sister-in-law Elise is gorgeous {think peaches and cream english rose, very feminine and chic} plus she was having a girl, so like her! So we had to have an english style morning tea.

Menu: Scones with jam and cream, cupcakes, finger sandwiches and chocolate strawberries.

We draped everything in white table clothes and put little milk jugs of roses everywhere. It helped that at the time I had recently discovered Rachel Ashwell {queen of shabby chic} who's book Sumptuous Settings and Other Lovely Things was the perfect inspiration.

 
Rachel Ashwell does seriously pretty furniture too!


I did snap a picture of the nappy cake when it was done though.  You've probably seen a nappy cake before they're a popular shower centrepiece, just roll up some newborn nappies and secure with rubber bands, cover the rubber bands with ribbon and decorate as you will. The mama to be gets to keep all the nappies. 


I remember that broach was $2 and and it fitted perfectly with the pink and chocolate theme.


For my other sister-in-law Caroline we had a night time do. Caroline is also gorgeous but completely different {think vogue, blonde Italian, fashion designer for a husband and currently residing in New York}. We wanted something really chic so we played some opera lit a ton of candles and had Italian food.  

Menu: Brushetta, mozzarella risotto balls, antipasto plates and lots of yummy bread sticks and dips. 

I had seen this picture over in Martha land and loved the idea. 


So sweet right? A bit of craft wire and some stolen plants {weeds} later i had this. 


Seriously they're weeds from the roundabout down the road! The colours we did were light yellow and turquoise as she was having a boy. Naturally we had to have the word bambino and I added some sweet baby clothes to make a little washing line.  The packet of old fashioned wooden dolly pegs was $2 and I've used them a ton since. Bonus.


At each end of the table we had these terracotta pots filled with herbs. The pots were around $4 from Bunnings and I white washed them with buttermilk then left them in the sun. Next time I wouldn't bother or I'd just use paint, it took about five coats to get this mild look. I thought they needed something so I added these plant sticks I made on the computer. {If there is one place you can get away with something a bit cheesy, it's a baby shower.} 


This is a recent shower I did for my lovely friend Nina who has just had her gorgeous baby boy. Very simple just baby clothes on a washing line {fishing line and clear 3m hooks}. Easy and cute idea for over the drinks buffet {which is what this was}. 

This was just a few days after Christmas hence the tree decoration. 


But now I want to do something different for the next one {which is another baby boy}. I've got some more inspiration from Martha and now I'm thinking something more like this.


I don't even know what those round looking things are but I want them! Love the colours I'll have to get started planning, such fun!


10 February 2011

Baby Brain

Ok I have given up trying to think of something spectacular to write about for my first 'real' post and the pressure was really taken off when i realised that nobody even knows about this blog! So moving on.

I only have 4 weeks until I am officially mama to not 3 but 4 kiddos {insert maniacal laugh here} and I am yet to finish the nursery for number 3. The catch is kiddo number 3 and current resident is a girl {Paige} and number 4 will be a boy so I need something very baby and not so gender oriented which is lucky because at the moment it's a blank slate. I also plan to leave Paige in the room for as long as possible, so no switching to a boy nursery just yet. When we were building I didn't know I was having a baby girl and planned on the nursery being a very beachy turquoise, grey, green theme. Which I am still loving. Now I am desperate to finish it off for both of them, I have lots of lovely girly things to add but it's probably too late now and I find my mind wondering over different boy finishes I should be getting ready to introduce. mmmmmm.

Here it is now completely unfinished ready to get started.


Still love this fabric from Heather Bailey that I made into a duvet cover. Never got round to the bumper though and grew to love it bare.


Still loving these colours for a boy or a girl.

 
This is the pillow that started it all. 

So much to do! I definitely need some linen and I think I want a cool mirror plus some accessories and soft colour artwork to cover those walls. Speaking of those walls the colour is Taubmans Taupe Stone, which I had in my playroom and LOVED. So I went off to Bunnings and purchased some more using a Dulux one coat paint, yep you only have to roll one coat, bonus! Or so I thought, the colour turned out ..... darker and thicker, if that makes sense and I didn't love it {although I must improve my photography skills as it looks much warmer in real life than this picture shows}. I found out later that one coat paint is actually mixed with a different colour recipe, would've been handy to know that BEFORE I spent 2 days prepping and painting.  Also as it turns out my 3M velcro picture hanging strips {which I use on everything} just DO NOT stick on this paint, so I also have to make holes in the walls if I want to hang anything, which of course I do.  Just roll it twice people. I learned that lesson for you.

So lots to do, no time, big tummy .....  enter inspiration board.

And bit of soft turquoise furniture in a retro design would be so cool.

You may have noticed I have a lamp base and no shade! I picked up an ugly lamp for $10 at the tender centre {electrics were fine} and took to it with a can of flat white spray paint. Took 10 minutes. I sanded it back in places and now I love it. The shade that came with it was old, rusted and the wrong shape. I want a modern drum shade in a graphic print, so have to sort that out.  {As a virgin blogger I have just noticed my serious lack of 'before' or even 'during' photos of any of my projects. Will have to sort that out too.}


I LOVE this gorgeous nursery by Joni at Lay Baby Lay {the look no further than this nursery blog} and plan to do a family photo collage like this, lots of inspiration over there.


And this is the nursery by Elizabeth Sullivan that inspired me to get a gorgeous mobile.


I can't take credit for this crafty creation though. You could absolutely make one up with fabric remnants and some cute ribbon. I purchased mine from here though, they are custom made so I just handed over my scrap material and they whipped it up for me. 

Lets hope I can post about stage two of baby nursery soon, better get back to work!


25 January 2011

Project Blog

Well this is it, my little slice of cyber space. My new years resolution was to keep better records of our family life and this blog is part of that promise.

I realise the title may elude to creative capabilities i don't actually have so let me just state first up that i thought it was cute and catchy. Yes Im a mama,  I have 3 kiddos and SURPRISE {read shock} another on the way. And yes I like to do creative projects but heck, i'm no expert at anything.

So with that disclaimer out of the way I can say mama creative is a place to post and share and gather ideas about all the lovely projects I like to start {but not necessarily finish}.

So WELCOME and thanks for stopping by.